Key Methods for Reducing Image File Size
Large images create problems in many contexts—not just slow websites. Maybe you need to email a batch of photos but keep hitting attachment limits. Maybe your phone storage is filling up with camera roll images. Maybe Google's Lighthouse audit is flagging your site for unoptimized images, dragging down your SEO score.
The goal is to find a balance between small file size and good image quality. A 10 MB image is unnecessary for most purposes, but a pixelated image is also undesirable. Understanding resizing, format conversion, and compression gives you control over this balance—whatever your use case.
Comparing the Main Optimization Techniques
Each optimization technique has trade-offs. The correct approach depends on the task. Are you optimizing a single hero image or processing hundreds of product photos? This table outlines the main methods to help you choose.
| Method | Typical Size Reduction | Best For | Key Trade-Off |
|---|---|---|---|
| Resizing Dimensions | 50% - 95% | Large photos displayed in small containers | Cannot scale back up without losing quality |
| Format Conversion (WebP/AVIF) | 25% - 50% (vs. JPG) | Almost all web images | AVIF has less browser support than WebP |
| Quality Compression (Lossy) | 40% - 80% | Photographs and detailed images | Excessive compression creates artifacts |
| Metadata Stripping | 5% - 15% | Any image published online | Removes EXIF data photographers may want |
A combination of these methods usually produces the best results. Start by resizing, then compress and convert to the appropriate format. This creates a lean, fast-loading image that still looks sharp.
Why Image File Size Matters
Image file size affects more than just page load speed. Large photos create friction across many everyday situations—from email to cloud storage to mobile data usage. Understanding these scenarios helps you decide when optimization is worth the effort.
Common Scenarios Where Size Matters
- Email Attachments — Most email providers limit attachments to 20–25 MB total. A handful of uncompressed photos from a modern phone can easily exceed this. Compressing images lets you share more photos per email without hitting limits or forcing recipients to download via cloud links.
- SEO & Lighthouse Scores — Google's Core Web Vitals directly factor into search rankings. Large images hurt your Largest Contentful Paint (LCP) score, which affects where your site appears in search results. Lighthouse audits flag unoptimized images as a performance issue.
- Storage Space — A phone camera roll can grow to tens of gigabytes over time. Cloud storage plans have limits. Compressing photos before archiving them can significantly extend how long before you need to upgrade storage or delete memories.
- Upload Limits — Social media platforms, form submissions, and CMS systems often cap file uploads at 5–10 MB per image. A RAW photo or high-resolution export may need compression before it can be uploaded at all.
- Mobile Data — Not everyone is on unlimited data or fast Wi-Fi. Visitors browsing your site on cellular connections will appreciate smaller images that load quickly and consume less of their data plan.
Optimized images respect your audience's time, bandwidth, and storage—while keeping your own costs down.
The Website Performance Impact
For websites specifically, unoptimized images are often the biggest performance bottleneck. Consider these scenarios:
- E-Commerce — Product category pages with dozens of unoptimized thumbnails load slowly. Customers on mobile connections may leave before the page finishes rendering—lost sales before they even saw the product.
- Portfolios — A photographer's or designer's portfolio must be fast to make a good first impression. Irony aside, slow-loading images in a visual portfolio suggest a lack of attention to technical detail.
- Blogs — A travel blog with a dozen high-resolution photos per post creates multi-megabyte downloads. This hurts mobile users and can noticeably drag down search rankings.
In each case, correctly sizing and compressing images is a core skill that directly affects success.
Choosing the Right Format: JPG, PNG, WebP, and AVIF
Before using a compression tool, choose the right file format. The best choice depends on the image content and its intended use. There is no single "best" format for everything.
The main difference is how formats handle compression. Lossy compression, used by JPG, WebP, and AVIF, discards some image data that is not easily perceived by the human eye. This significantly reduces file size, but the quality loss is permanent.
Lossless compression, used by PNG, packages all pixel data without discarding any of it. This method is similar to a ZIP archive. It preserves perfect quality but results in much larger files.
Older Formats: JPG and PNG
For years, JPG was the standard for photos on the web. Its lossy compression works well for complex images with millions of colors, such as photographs. You can adjust the quality level to balance file size and visual clarity.
PNG is the traditional choice for graphics requiring a transparent background, like logos or icons. Its lossless nature preserves sharp lines and solid colors perfectly, but at the cost of a larger file size.
Avoid PNG for Photographs
Do not use PNG for photographs on a website. A photo saved as a PNG can be 5 to 10 times larger than the equivalent JPG with no visible benefit. Reserve PNG for simple graphics where transparency is required.
Modern Formats: WebP and AVIF
Newer formats offer improved performance. WebP, developed by Google, is a versatile format for the modern web. It supports both lossy and lossless compression, as well as transparency. This makes it a suitable replacement for both JPG and PNG.
A WebP image is typically 25-35% smaller than a high-quality JPG, with little perceptible difference. With support across all major browsers, it is a good default choice. If you have existing JPGs, you can convert them to WebP in bulk.
AVIF offers even greater compression. It can create files up to 50% smaller than a comparable JPG. For an e-commerce site with thousands of product photos, these savings are substantial. The trade-off is that AVIF browser support is not as universal as WebP. If you use AVIF, it is good practice to provide a WebP or JPG fallback. For more technical details, see our guide to common image formats.
Ready to convert your image library? Try JPG to AVIF or JPG to WebP conversion.
Image Format Comparison
| Format | Compression Type | Best For | Browser Support |
|---|---|---|---|
| JPG | Lossy | Photographs, complex images | Excellent |
| PNG | Lossless | Logos, icons, graphics with sharp lines | Excellent |
| WebP | Lossy & Lossless | Photos, graphics, transparency | Excellent |
| AVIF | Lossy & Lossless | Performance-critical images | Good (and growing) |
The table shows why WebP is now the standard for most web developers. It provides the flexibility of older formats in a much smaller package. To check exact browser support right now, visit caniuse.com.
Which Format Should You Use?
Here is a workflow for your next project:
- For photographs and complex images — Start with WebP. It offers a good balance of quality, size, and support. For maximum performance, use AVIF with a WebP fallback.
- For logos, icons, and simple graphics — If you need a transparent background, WebP is usually the best choice. It will be smaller than a PNG.
- For iPhone photos (HEIC) — Modern iPhones save photos as HEIC by default. Convert HEIC to JPG for universal compatibility, or go straight to WebP for smaller files.
- For animations — Do not use GIF. Its 256-color limit and large file sizes are outdated. Both WebP and AVIF support animation with better color and compression.
Making WebP your default format will immediately reduce your image file sizes. This leads to a faster website.
Practical Ways to Compress Your Images
Once you have chosen the right format, you can begin compression. Three main actions, when combined, will significantly reduce image megabytes: resizing dimensions, adjusting quality settings, and stripping metadata. Each one addresses a different aspect of the file. Using them together is key to getting small files that still look good.
Start by Resizing Image Dimensions
Resizing an image to its display dimensions is the most important step. The width and height in pixels are a primary factor in file size. A photo from a modern camera might be 5000 pixels wide, but it will rarely be displayed at that size on a website.
Uploading a large image and letting the browser shrink it is inefficient. The user still has to download the entire large file, which slows down the page. The correct approach is to resize the image before uploading it. If an image will appear in a 1200-pixel-wide content block, do not upload it any larger than that.
Here are some common sizes to use as a starting point:
- Full-Width Hero Images — Aim for 1920 to 2560 pixels wide. This covers most large desktop monitors.
- Blog Post or Content Images — A width between 1200 and 1600 pixels is usually sufficient.
- Thumbnails or Previews — These can be much smaller, often 300 to 600 pixels wide.
Resizing an image can often reduce its file size by over 90%. This should always be the first step.
Fine-Tune the Quality Setting
After resizing, the next step is adjusting the compression quality. When saving a JPG or WebP, most tools provide a quality slider, usually from 0 to 100. This slider represents a direct trade-off: higher quality means a larger file.
A setting of 100 produces a high-quality image with a large file size. A setting of 0 results in a small but pixelated file. The optimal setting is usually in the middle.
Recommended Quality Settings
For most web photos, a quality setting between 75 and 85 is effective. This typically reduces the file size by another 40-60% compared to a high-quality setting, with no easily discernible difference.
You may need to experiment. A simple background image might be acceptable at a quality of 60-70. A detailed product photo might require a setting closer to 85-90. You can learn more about the technical details in our guide to JPG compression.
Strip Unnecessary Metadata
The final step is to remove hidden data. Photos often contain EXIF (Exchangeable Image File Format) data. This includes camera model, lens information, date, and sometimes GPS coordinates.
This information is useful for photographers but is unnecessary for a website image. It adds kilobytes to the file size for no benefit. Stripping this metadata can reduce a file by another 5-15%. This small saving adds up across many images on a page.
Many tools perform this step automatically. A service like Compress.FAST strips this data by default, producing the smallest possible file. This also improves privacy by not publicly sharing location data.
Combining these three techniques—resizing, adjusting quality, and stripping metadata—creates an effective workflow. This approach ensures your images are lean and load quickly.
Desktop Tool Recommendation: FastStone Photo Resizer
For batch resizing on Windows, FastStone Photo Resizer is a lightweight, free tool (for home use) that handles the job without bloatware. I have personally used this to resize thousands of photos—converting images from 6K resolution down to 4K or 2500–3000 pixels—saving gigabytes of storage space.
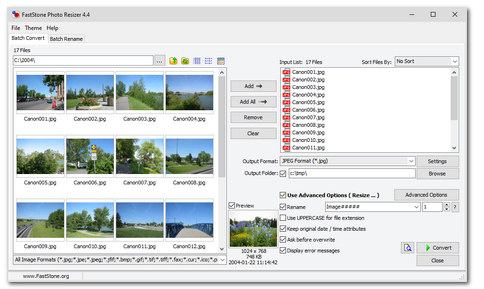
Key features that make it useful:
- Resize by Long Edge — Set a maximum dimension (e.g., 2500px) and it automatically maintains aspect ratio for all images.
- Batch Processing — Drop hundreds of files in, let it work through them. Supports multithreading for faster processing on modern CPUs.
- Format Support — Reads HEIC, WEBP, JPG, PNG, TIFF, and more. Exports to JPG, PNG, and other common formats.
- In-Place or New Folder — Choose to overwrite originals or save resized versions to a separate folder—your choice.
It runs on Windows 10, Windows 11, and Windows Server. No adware, no subscription—just a straightforward tool that does exactly what it claims.
FastStone is excellent for local batch work when you have hundreds or thousands of files sitting on your own machine. But if you need to compress images from a work laptop, a client's computer, or your phone—without installing software—a browser-based tool is more practical.
Browser-Based Alternative: Compress.FAST
For quick jobs from any device, Compress.FAST handles up to 50 files at once for free—or up to 1,000 on paid plans. No software to install, no account required to start. Just drag and drop your images, let the service process them on encrypted EU servers, then download. Files are deleted automatically after processing—useful when you're working with client photos or need to compress something quickly from any machine.
Frequently Asked Questions About Reducing Image Files
Here are direct answers to common questions about image optimization.
Will reducing image size degrade the quality?
Not if done correctly. Modern compression formats like WebP are designed to discard data the human eye does not easily notice, especially at quality settings between 75 and 90.
The key is to find the right balance. Aggressive compression, like a JPG at quality 20, will create visible blocky artifacts. A carefully optimized image should look nearly identical to the original on a standard screen. A visual check for your most important images is recommended.
The relationship between file size and quality is not linear. You can often reduce file size by 50% with almost no visible change. Degradation typically occurs when trying to reduce the size by the final 10-20%.
What is the best image format for a website?
For most web use cases today, WebP is the best choice. It offers much better compression than older formats like JPG and PNG. It also supports transparency and works in all modern browsers.
If your primary goal is the smallest possible file size, AVIF is the next step. It can often be 20-30% smaller than WebP. The trade-off is that browser support is not yet universal, so a fallback to WebP or JPG is recommended.
PNG should only be used for simple graphics like logos where perfect, lossless transparency is required.
How can I compress photos on my phone?
You can use online tools directly in your phone's browser. Services like Compress.FAST work without requiring an app installation.
Upload a photo from your camera roll, let the service process it, and then download the optimized version. Since you are uploading personal files, ensure the tool has strong security and privacy policies.
Look for these trust signals: TLS 1.3 encryption for all file transfers, processing on secure EU-based servers, and an automatic deletion policy that erases your files after a short period. This makes it safe and easy to reduce photo megabytes before emailing or posting them.
Should I resize an image or just lower its quality?
You should do both, but always start by resizing. The image dimensions (width and height) are the largest factor in file size. A 4000x3000 pixel photo contains data for 12 million pixels and will be large even at low quality.
First, resize the image to the maximum dimensions at which it will be displayed. If it will appear in an 800-pixel-wide column, there is no need to upload it any larger.
After resizing, adjust the compression quality to around 80. Resizing removes the bulk of the data, and compression optimizes the rest. This two-step process is the most effective way to create a small, fast-loading image.
Compress.FAST handles image compression on encrypted EU-based servers and deletes your files automatically—fast, simple, and secure.

Stewart Celani
Founder
15+ years in enterprise infrastructure and web development. Stewart built Tools.FAST after repeatedly hitting the same problem at work: bulk file processing felt either slow, unreliable, or unsafe. Compress.FAST is the tool he wished existed—now available for anyone who needs to get through real workloads, quickly and safely.
Read more about Stewart